We love warm, homemade chocolate chip cookies straight from the oven. Seriously, what could be better? This is our classic, fool-proof chocolate chip cookie recipe that ensures perfectly soft and buttery cookies every time. We promise, you’ll love these cookies as much as we do!
For more homemade cookie goodness, try our easy Air Fryer Chocolate Chip Cookies.
Why Our Recipe
- My tried-and-true recipe I’ve been making for almost 30 years!
- The perfect texture with a soft center, gooey melted chocolate, and a touch of crispiness around the edges.
- Use this recipe as the perfect cookie dough base and customize with your favorite mix-ins.
- Make a quick batch to satisfy your sweet tooth and freeze the rest of the dough for later!
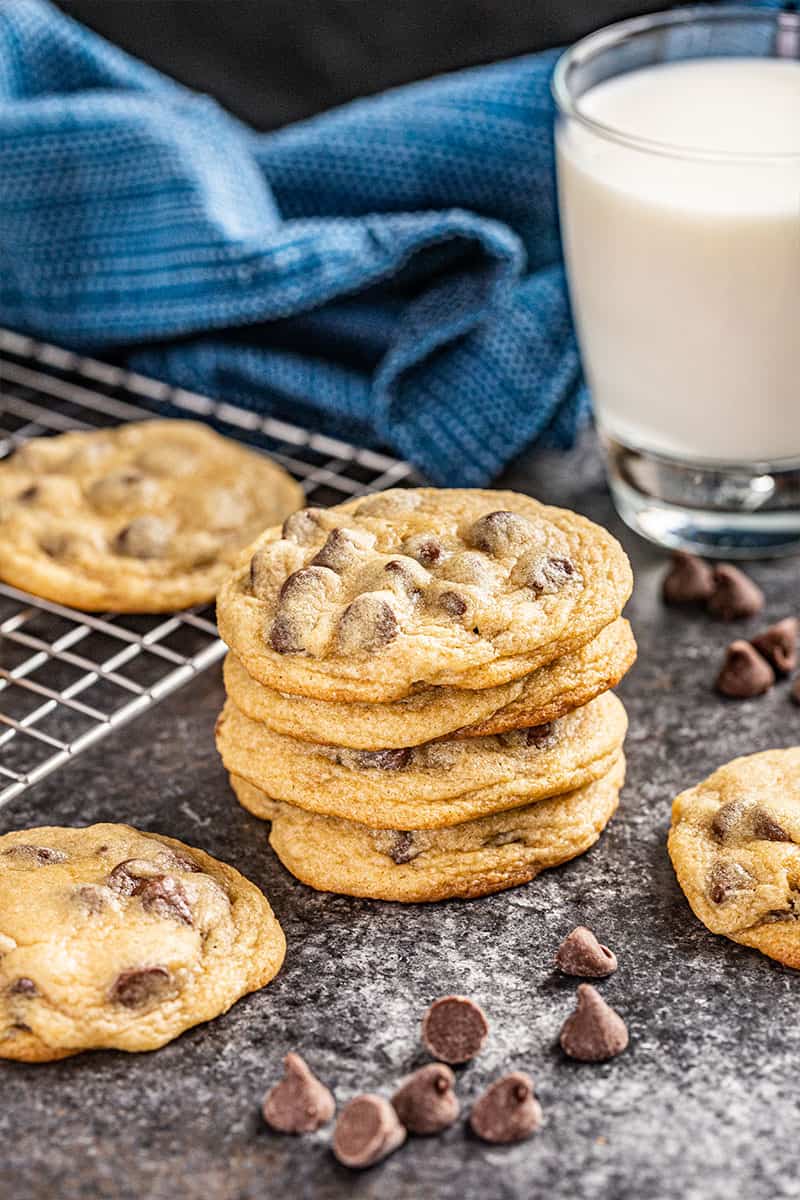
We have been baking these chocolate chip cookies for the past 25 years. It all started in the 5th grade, determined to make cookies without an adult’s help, where instead of 1/2 teaspoon of baking soda, 1/2 cup of baking soda was added! Whoops! They grew larger and larger in the oven until they covered the entire pan! This learning lesson began our love for cooking. Mastering the ultimate chocolate chip cookie was extremely important, and we are happy to share that recipe with you today.
Ingredient Notes
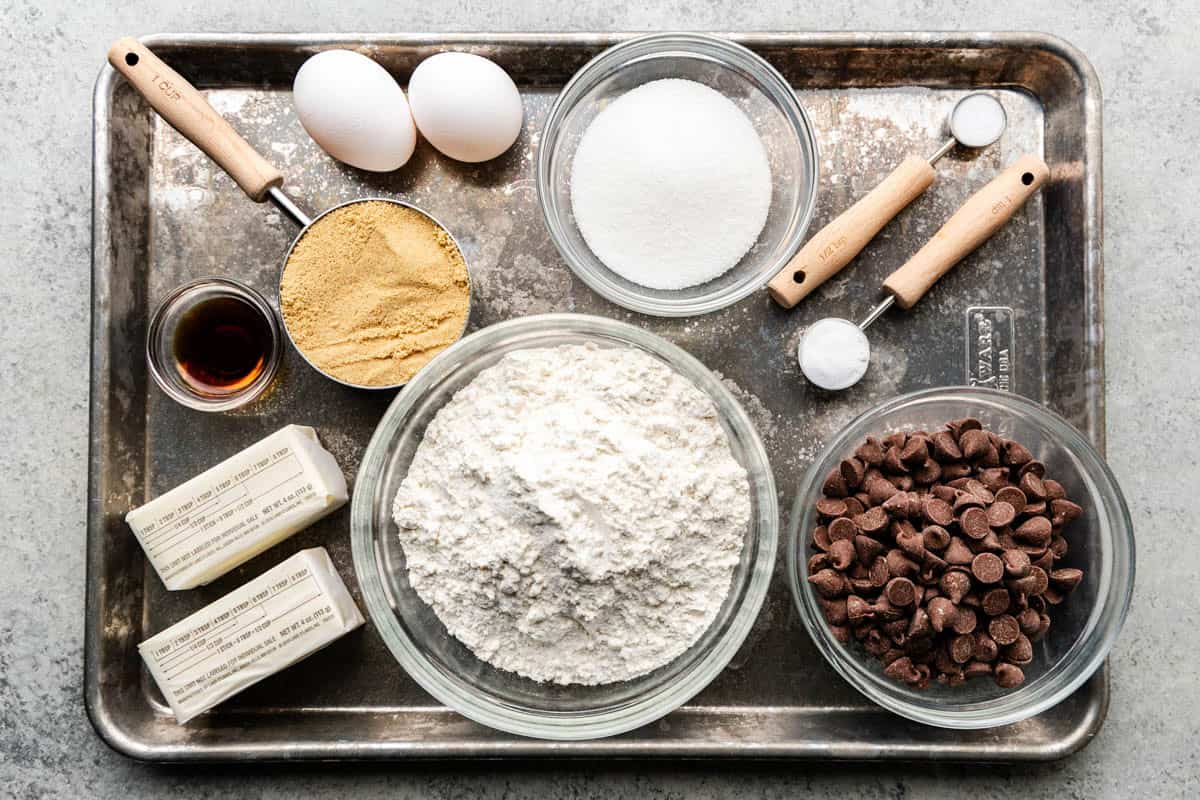

- Butter: Unsalted butter can be used, but add an extra pinch of salt to the dough. Make sure it’s softened for easy creaming.
- Brown Sugar: Light or dark brown sugar works, but dark brown sugar is going to give you a deeper flavor and a chewier cookie.
- Granulated Sugar: Balances the sweetness and helps the cookies achieve lightly crisp edges.
- Vanilla Extract: Pure vanilla extract gives the best flavor, but imitation vanilla also works.
- Eggs: Use large eggs at room temperature for best results.
- All-Purpose Flour: Stick with regular all-purpose flour for this one. Bread flour can also work.
- Baking Soda: Check the expiration date to ensure proper leavening.
Chocolate Chip Options
The type of chocolate chips you use is a matter of personal preference. There are no wrong answers here! Both semi-sweet and milk chocolate chips will work, or you can use a combination of both.
Mini chips, chunks, and disks all work! You can even chop up a chocolate bar instead of using chips if you want those big, melty puddles of chocolate throughout your cookies. Just stick to around 2 cups total.
Parchment Paper vs. Nonstick Cooking Spray
I always recommend using parchment paper or a silicone baking mat when baking cookies. It keeps the cookies from sticking, and it does it without adding any extra grease.
Nonstick cooking spray is the easier option, but it can leave a slightly greasy texture on the bottoms of your cookies. It also tends to brown them faster, which isn’t always a good thing. With parchment or a silicone mat, you get more even baking and a cleaner, crisper finish.

The Science Behind the Perfect Cookie
There’s real science behind what makes these cookies turn out just right every time. It’s not magic—it’s how the ingredients work together. This recipe is all about the balance that gives you soft, chewy centers with just the right amount of crisp around the edges.
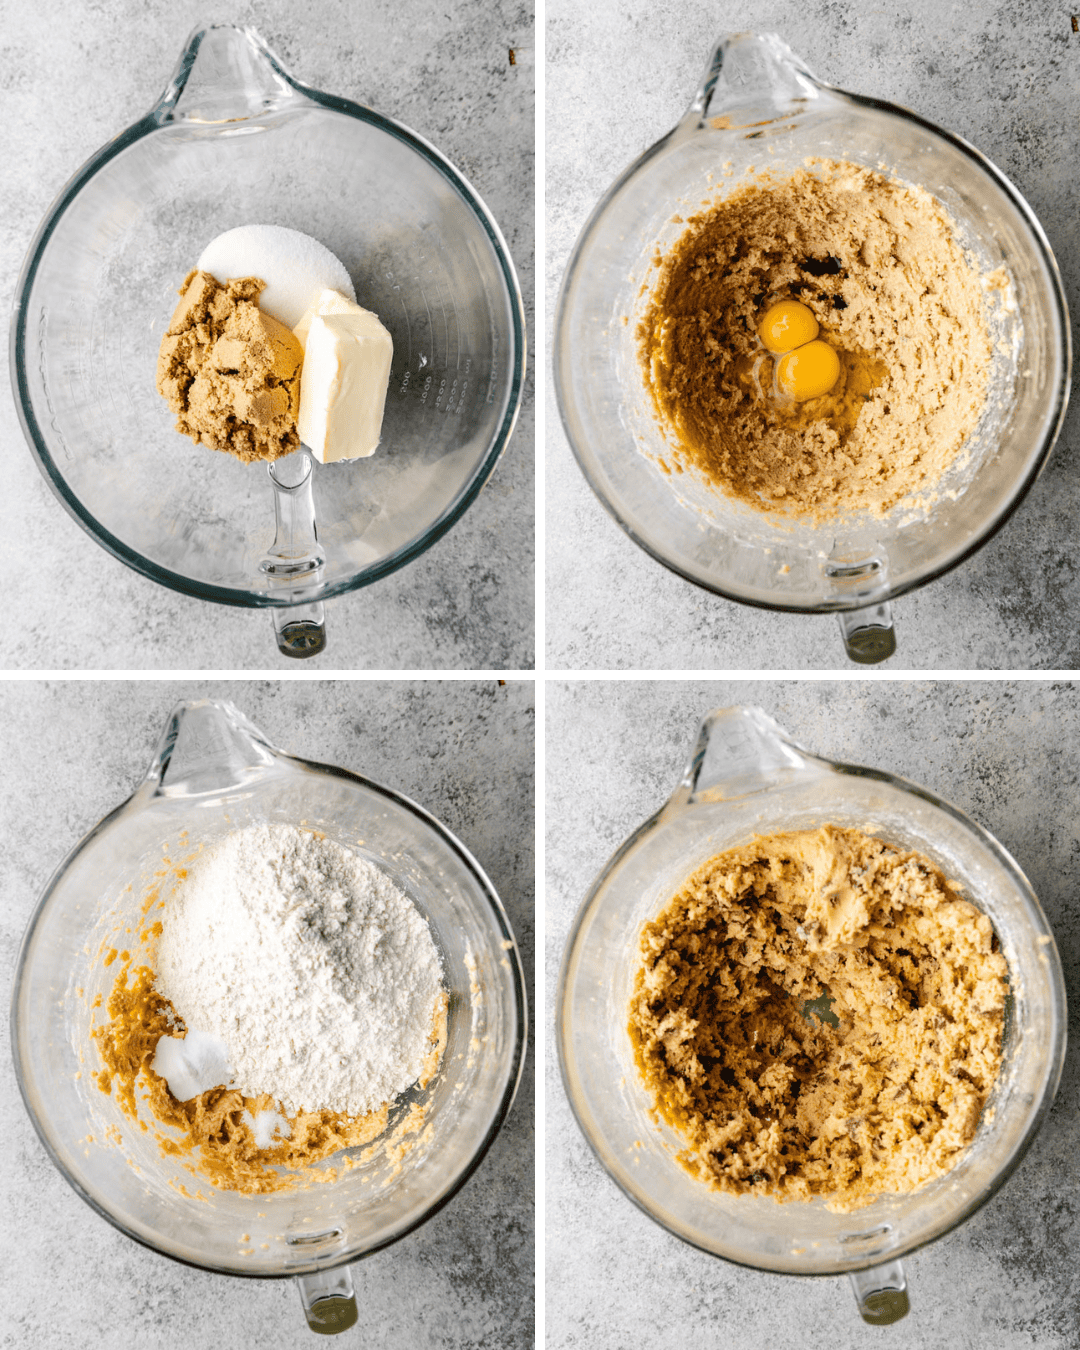
Butter creaming matters. Softened butter (not melted!) is creamed with the sugars for a solid 2 to 3 minutes in this recipe. Don’t skip on the time! This does a couple of very important things. First, it dissolves the sugars completely in the butter. Second, it beats in a lot of air which will allow your leavening agent (the baking soda) to give the cookies a bit more lift.
Dark brown sugar adds moisture. The high molasses content in dark brown sugar gives the cookies a deeper flavor, but that extra moisture is what helps keep the inside of your cookies soft and chewy for days. The granulated sugar is what adds crispiness around the edges.
No chill time needed. But if you have the time (or the patience), a quick 30-minute chill will make the cookies puff up just a bit more if that’s your thing.
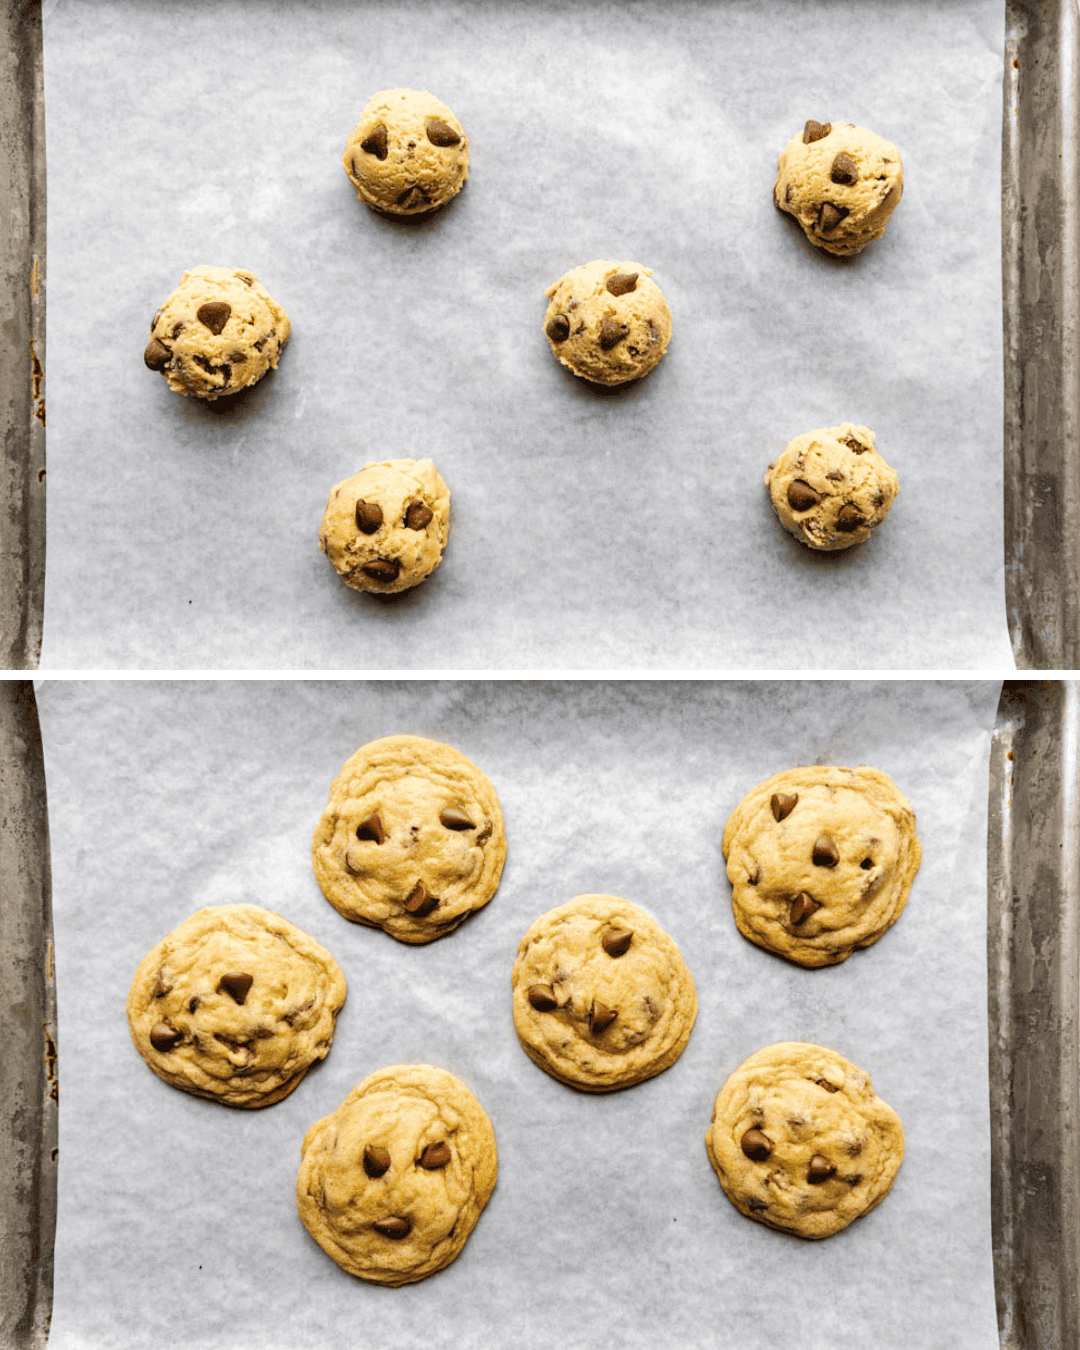
Timing is everything. Don’t you dare overbake! Baking for just 10 to 12 minutes ensures the centers stay soft. Pull them out when the edges are golden but the centers still look a little underdone. That’s the sweet spot. They’ll finish baking on the hot pan, giving you those dreamy gooey centers without overcooking.

Troubleshooting
Even a tried-and-true cookie recipe can turn out a little different depending on your ingredients, kitchen setup, or even the weather or your mood. We’ve all been there. If your cookies didn’t turn out quite how you hoped, here are a few quick fixes to get you back on track.
Your cookies are spreading too much. That butter was probably a little too warm. Make sure it’s softened—not melted. If your dough feels super soft, just pop it in the fridge for 20 to 30 minutes before baking. That’ll help them hold their shape.
They’re not spreading at all. This usually means there’s too much flour. It’s an easy mistake to make as measuring flour is a bit inaccurate without a kitchen scale. Fluff, scoop, and sweep is the method I use.
Too cakey? That can happen if you overmix the dough. Overmixing can incorporate too much air into the dough or develop too much gluten, both of which can lead to a cakier texture. Mix just until the flour disappears.
Burnt bottoms or crispy edges? This might be your baking pan. Dark pans heat up more in the oven and can brown the bottoms faster. I recommend using a light-colored sheet pan. If you only have dark ones, just lower your oven temp by 15 to 25 degrees and keep a close eye toward the end of the bake time.
Cookies are getting hard after they cool. Take them out of the oven when the edges are set, but the centers still look a little underbaked. They’ll keep baking on the hot pan. Once they’re cool, store them in an airtight container—while they’re still just barely warm is even better to help lock in that softness.


Make Now, Bake Later
This recipe is perfect if you want to quickly make the dough and save it for baking either the next morning or later down the road when your cookie craving hits!
Want just a little treat now and more later? Make the full batch of dough and stash the rest in the refrigerator. Cookie dough will stay good in the fridge for up to 72 hours. When you’re ready for more, just scoop and bake straight from the fridge—no need to let it come to room temp.
This cookie dough can also easily be frozen. For best results, shape into balls and freeze on a baking sheet. Once frozen, transfer to a resealable plastic freezer bag for long-term storage, up to 3 months. When ready to bake, place frozen cookie dough in the oven and bake for 12-15 minutes.
Storage Instructions
Store completely cooled cookies in an airtight container on the counter. Cookies stay fresh for 3 to 5 days.
*Warm, gooey cookies are a must. If you don’t eat all these cookies in one sitting, you can put them in the microwave for 10-15 seconds or until warm.
More cookie recipes…
Trending Products

Ninja BC151EM Blast Portable Blender, Cordless, 18oz. Vessel, Personal Blender-for Shakes & Smoothies, BPA Free, Leakproof-Lid & Sip Spout, USB-C Rechargeable, Dishwasher Safe Parts, Forest Green

KitchenAid Ribbed Gentle Silicone Oven Mitt Set, 7″x13″, Milkshake 2 Depend

MOMEEMO Glass Cleaning soap Dispenser Set, Incorporates Hand Cleaning soap and Dish Cleaning soap Dispenser.Appropriate for Kitchen Decor. (Black & White)

MIULEE Pack of two Corduroy Ornamental Throw Pillow Covers 18×18 Inch Comfortable Boho Striped Pillow Covers Trendy Farmhouse House Decor for Spring Couch Dwelling Room Sofa Mattress Cream White

AWLKIM Digital Meat Thermometer for Cooking – Waterproof Kitchen Thermometer with Backlight and Hold, Fast Instant Read Food Thermometer, Candy Making, Outside Grill, Stocking Stuffers for Adult Men

Butter Dish with Lid and Butter Roller Knife for Countertop – Unbreakable Metallic Keeper Container with Excessive-quality Double Silicone Sealing, for Kitchen Farmhouse Decor

13Pcs Common Vacuum Attachment Package 1-1/4″ Vacuum Hose Adapter Moist Dry Plastic Vacuum Cleaners Equipment with Extension Wand Horse Hair Brush Versatile Crevice Instrument Adapter for Store Vac Attachment

9 Pcs Common Vacuum Attachments – Hose Adapters, Ground Brush, Crevice Instrument for Store Vac Equipment

GENMOUS Farmhouse Kitchen Tiered Tray Decor Gadgets Mini Set, Rustic Black and White Kitchen Counter Decor, Two Tiered Tray Kitchen Decor Set for Residence Kitchen Eating Room Desk Ornament


